

Table of Contents
- What You’ll Need Before Starting
- Resin Bound Driveway Installation: The Complete Process
- Resin Bound Driveway Maintenance After Installation
- Resin Driveway Planning Permission UK Requirements
Last Updated: August 18, 2026
What You’ll Need Before Starting
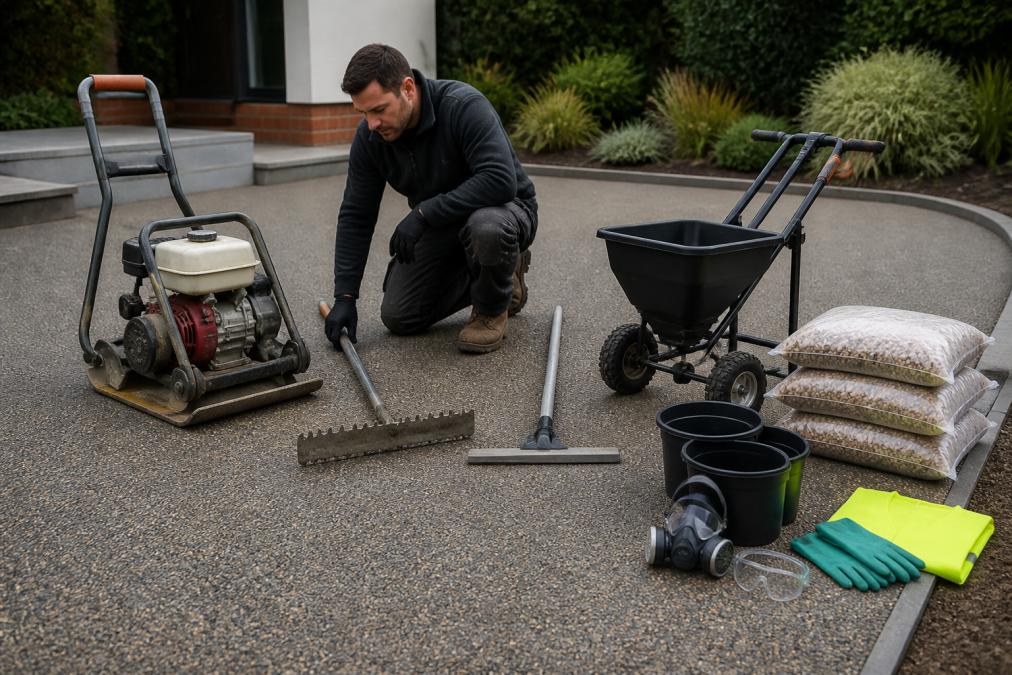
Before attempting a resin bound driveway installation, gather essential tools and materials. You’ll need a mechanical compactor, a mixing machine or drill with paddle attachment, a spreader or squeegee, and a straightedge. Protective equipment includes gloves, safety glasses, and a dust mask. Materials comprise a geotextile membrane, crushed stone or gravel, resin binder, decorative aggregate, and a primer or bonding agent.
Temperature control matters significantly. Resin cures best between 10°C and 25°C. Installation during cold weather or high humidity can compromise adhesion and curing times. The driveway should be clear of vehicles and foot traffic for at least 24 hours after installation, though full curing typically takes 3-7 days depending on conditions.
Resin Bound Driveway Installation: The Complete Process
Installing a resin bound driveway involves five distinct stages: surface preparation, sub-base installation, primer application, resin and aggregate mixing, and final levelling and curing. Each stage builds on the previous one, so skipping steps creates problems that become visible only after the surface has hardened.
Preparing the Existing Surface
The existing driveway must be clean, dry, and free from loose material. Pressure wash the surface to remove dirt, moss, and algae, then allow it to dry completely. Fill any cracks or potholes with appropriate repair mortar or concrete. A slope of roughly 1 in 80 is ideal for drainage. If the existing surface is smooth asphalt or concrete, lightly roughen it with a grinder or scarifier to improve adhesion, then remove all dust before proceeding.
Laying and Compacting the Sub-Base
The sub-base is the foundation of your resin bound driveway. Lay a geotextile membrane across the prepared surface to prevent weeds and provide layer separation. Over this, spread a layer of crushed stone or Type 1 aggregate, typically 40-50mm deep for residential driveways. Compact this thoroughly using a mechanical compactor, working systematically across the entire area.
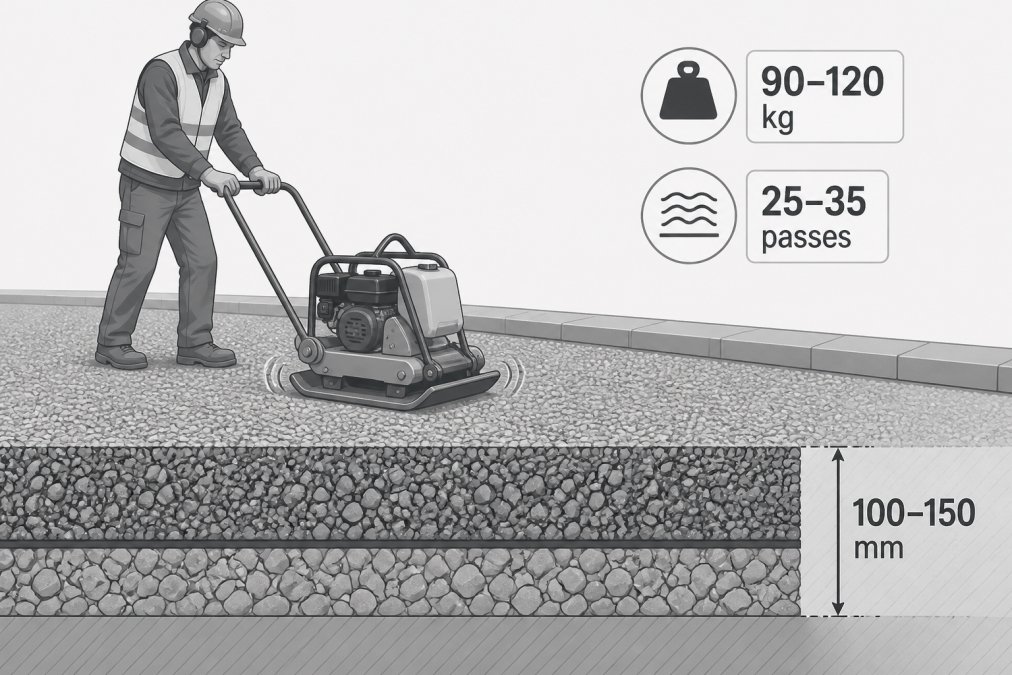
Proper compaction is critical. An inadequately compacted base will shift under vehicle weight, causing the resin surface to crack and sink. The base should feel solid underfoot with minimal movement.
Applying Primer or Bonding Agent
Once the sub-base is compacted and level, apply a primer or bonding agent to help the resin adhere properly. Follow the manufacturer’s instructions regarding coverage rate and drying time, which typically ranges from 30 minutes to 2 hours.
Mixing Resin and Aggregate
Resin bound driveway installation requires precise mixing of resin binder and decorative aggregate. Use a mechanical mixer or a drill with paddle attachment to combine these materials. The ratio is typically 1 part resin to 4-6 parts aggregate by volume, though this varies by manufacturer. Mix only the quantity you can apply within 15-20 minutes, as the resin begins to cure once mixed. Ensure the aggregate is clean and dry before mixing.
Laying and Levelling the Resin Mix
Spread the mixed resin and aggregate across the prepared surface using a squeegee or spreader. Work in manageable sections, typically 2-3 square metres at a time. Apply the mixture to a depth of approximately 18-20mm for the finished surface.
Use a straightedge to level the surface, working from one end of the driveway to the other. The surface should be smooth and even, with no high spots or depressions that could cause water pooling. Allow the resin to cure fully before allowing traffic. Most products require 24-48 hours for pedestrian traffic and 3-7 days for vehicle traffic, depending on temperature and humidity.
Resin Bound Driveway Maintenance After Installation
A resin bound driveway is low-maintenance compared to traditional gravel or unsealed asphalt, but it still requires basic care. Sweep the surface weekly to prevent debris accumulation. In winter, use a soft brush rather than a stiff broom. Avoid salt-based de-icers; use sand or grit instead for traction on icy conditions.
For spills, clean them immediately with warm soapy water and a soft brush. Petrol, diesel, and oil can stain resin if left untreated. Moss and algae growth is common in damp climates. Remove these with a soft brush and dilute bleach solution, or use a low-pressure wash (below 100 bar) to avoid damaging the surface. Avoid high-pressure washing, as this can displace the aggregate and damage the resin binder.
Resin Driveway Planning Permission UK Requirements
Planning permission requirements for a resin bound driveway installation vary depending on your property and local authority regulations. In most cases, a new driveway or resurfacing work falls under permitted development rights, meaning you don’t need formal planning permission.
However, if your property is a listed building or located within a conservation area, planning permission is typically required before any driveway work begins. Contact your local planning authority to confirm the status of your property. The Planning Portal provides guidance on permitted development rights and when formal permission is needed.
Building regulations approval may be required if the driveway is part of a larger building project or if structural work is involved. For a standard resin bound driveway installation on an existing surface, building regulations approval is usually not necessary. However, check with your local building control office if significant excavation or sub-base work is required.
As a Brett Approved Premier Installer, KT Lake Paving and Landscaping ensures all work complies with current British Standards and local regulations. The company can advise on planning and building control requirements specific to your property before work begins.
Sustainable drainage systems (SuDS) are now encouraged for new hard surfaces to manage surface water runoff. Permeable resin bound surfaces can contribute to SuDS compliance, though this depends on your local authority’s requirements. The CIRIA SuDS Manual provides detailed guidance on drainage standards for hard surfaces.
Installing a resin bound driveway requires careful attention to each stage, from sub-base preparation through to final curing. For homeowners seeking professional installation that meets British Standards and comes with a 10-year guarantee, KT Lake Paving and Landscaping offers free, no-obligation estimates and expert advice tailored to your property’s specific requirements. Contact the team to discuss your driveway project and receive a detailed quote for resin bound driveway installation.
Frequently Asked Questions
How long does a resin bound driveway take to install?
Installation timescale varies depending on driveway size and site conditions. Most residential driveways take 2-5 days from site preparation through to curing. Preparation and sub-base work typically require 1-2 days, whilst resin application and initial curing take a further 1-3 days. You should avoid driving on the surface for 24-48 hours after completion, though full strength develops over 5-7 days.
Do I need planning permission for a resin driveway in the UK?
Most resin bound driveways fall under permitted development rights and do not require planning permission, provided the surface is permeable (which compliant resin bound installations are). However, if your driveway fronts a conservation area or listed building, you may need consent. Check with your local planning authority before starting work. A professional installer like KT Lake can advise on your specific situation.
What is the difference between resin bound and resin bonded?
Resin bound consists of resin mixed throughout the aggregate before laying, creating a homogeneous, permeable surface with the aggregate fully encapsulated. Resin bonded applies a thin resin layer to an existing surface with aggregate scattered on top. Resin bound is thicker, more durable, and better suited to driveways, whilst resin bonded is typically used for decorative overlays. Resin bound also meets stricter British Standards for structural performance.
How should I maintain my resin bound driveway after installation?
Keep the surface clean by sweeping regularly and rinsing with water. Avoid harsh chemicals and high-pressure washing, which can damage the resin. Treat oil and fuel spills promptly with specialist cleaners. In winter, use salt sparingly and never use grit containing sharp stones. Inspect for any cracks or loose aggregate annually. A well-maintained resin bound driveway typically lasts 15-20 years with minimal intervention.


