
Table of Contents
- How to Replace Damaged Block Paving Bricks: Assessment and Planning
- Tools for Block Paving Repair: What You’ll Need
- How to Lift Block Paving Without Damage: Removal Techniques
- Preparing the Sub-Base and Using Kiln Dried Sand for Block Paving
Last Updated: August 1, 2026
How to Replace Damaged Block Paving Bricks: Assessment and Planning
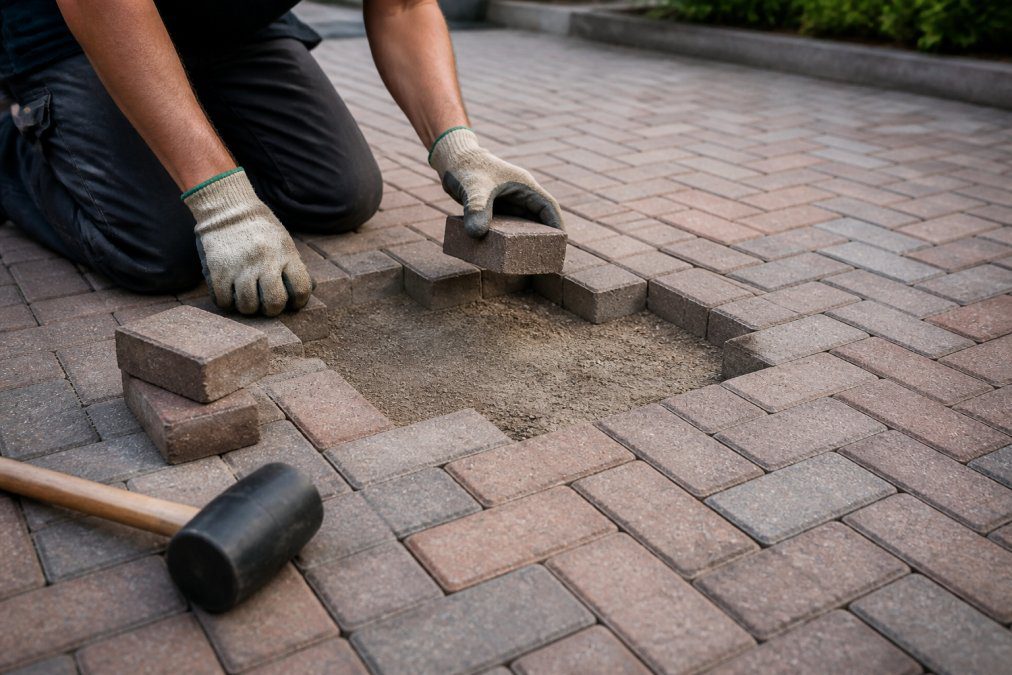
Learning how to replace damaged block paving bricks is essential for any property owner in Norfolk looking to maintain their driveway or patio. Damaged block paving rarely appears in isolation, what looks like a single cracked interlocking block often signals a deeper issue with the sub-base or bedding layer beneath it. Most DIY repairs fail because people replace the visible brick without fixing the root cause, only to watch the new block sink or crack within months.
Start by assessing the extent of damage. Is it a single block, or are multiple pavers affected across a wider area? Single isolated damage typically means you can patch repair just that block. Multiple sunken or cracked blocks suggest sub-base failure, which requires re-laying the entire affected area. Walk the surface barefoot or with your hand, you’ll feel settlement and movement that photographs might miss.
Check whether the block is truly damaged or simply loose. Press down on adjacent pavers. If they move significantly or rock, the bedding layer has failed. If only one block is loose whilst others are firm, extraction and reinstatement of that single unit is the answer. If the whole section moves, you’re looking at a larger repair.
Before committing to any repair, identify the root cause. Is water pooling on the surface? Are tree roots lifting the pavers? Has frost heave shifted the sub-base? Fixing the symptom without addressing the cause wastes time and money.
Tools for Block Paving Repair: What You’ll Need
Proper equipment makes the difference between a clean repair and a frustrating afternoon of struggle. For block extraction, you’ll need a cold chisel (also called a brick bolster), a rubber mallet, and ideally a flat pry bar. The cold chisel cuts through the jointing sand between blocks; the rubber mallet provides controlled force without shattering the pavers.
Once the block is out, you’ll need sharp sand for the bedding layer. Sharp sand is coarser and compacts firmly; kiln dried sand is finer and used for jointing between blocks. For sub-base preparation, you’ll also need a plate compactor. Hiring one costs far less than purchasing, and for a single-block repair, hiring makes financial sense.
A spirit level ensures your new block sits flush with its neighbours. A straightedge helps you check that the replacement block aligns with surrounding pavers. Grab a broom for cleanup.
| Tool | Purpose | Hire or Buy? |
|---|---|---|
| Cold chisel & rubber mallet | Block extraction | Buy |
| Plate compactor | Sub-base compaction | Hire |
| Sharp sand | Bedding layer | Buy by bag |
| Kiln dried sand | Jointing between blocks | Buy by bag |
| Spirit level | Alignment check | Buy or borrow |
| Pry bar | Lifting blocks | Buy |
Never attempt to extract a block with a standard hammer, you’ll shatter it and risk damaging surrounding pavers. The rubber mallet’s softer strike is worth the small investment.
How to Lift Block Paving Without Damage: Removal Techniques
The extraction phase determines whether you’ll reuse surrounding blocks or damage them. Start by clearing any debris from the joints around the damaged block using a stiff brush or old screwdriver.
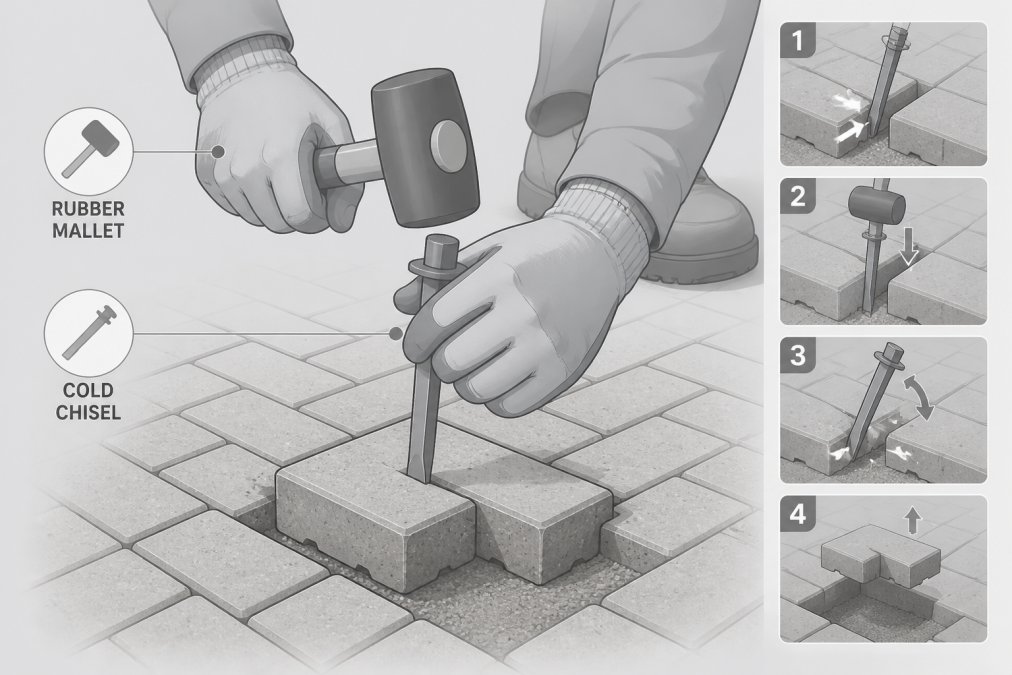
Position your cold chisel into the joint on one side of the block, angling it slightly downward. Tap gently with the rubber mallet, you’re creating a gap, not smashing through. Work your way around all four sides, tapping a little at each joint to distribute force evenly.
Once you’ve loosened all sides, slide your pry bar under one edge and gently lever upward. The block should lift with minimal resistance. If stuck, tap the chisel again rather than forcing the bar. For blocks truly stuck, apply water to the joints and wait 15 minutes to soften the sand.
Remove the old bedding sand completely and inspect the sub-base underneath. If the base is soft, muddy, or shows water damage, this is your root cause and needs reworking before you install the new block.
Preparing the Sub-Base and Using Kiln Dried Sand for Block Paving
A solid sub-base determines whether your repair lasts five years or five months. If the sub-base is firm and dry, refresh the bedding layer by spreading a fresh 30-40mm layer of sharp sand, levelling it with a straightedge, and compacting it lightly with a hand tamper or plate compactor on its lowest setting.
If the sub-base is soft, crumbly, or shows water pooling, you have a drainage problem. Remove the damaged block and at least 50mm of surrounding area. Clear away all soft material down to firm ground. Compact the exposed sub-base firmly using the plate compactor, making two or three passes until the ground feels solid underfoot.
Add a fresh layer of sharp sand (40-50mm), level it, and compact again. Place your new block so it sits level with its neighbours, checked with a spirit level. The block should not rock or move when pressed down.
Kiln dried sand is NOT for the sub-base. It’s the fine jointing sand you sweep into gaps between blocks after installation. Using it as bedding causes poor compaction and early failure. Sharp sand compacts; kiln dried sand doesn’t.
Once the block is set, fill the joints around it with kiln dried sand, sweeping it in from all directions. Brush off excess and lightly water the surface. The sand will settle; add more if needed after a few days.
Allow the repair to cure for at least 48 hours before heavy use. Light foot traffic is fine; parking a car on a freshly repaired section risks re-settling the block.
Damaged block paving needn’t mean a complete driveway overhaul. A methodical approach, assessing the root cause, extracting carefully, preparing the sub-base properly, and finishing with kiln dried sand, solves most problems permanently. For larger areas or when the sub-base shows serious failure, professional re-laying ensures the repair lasts. KT Lake Paving and Landscaping specialises in both patch repairs and full driveway re-laying, backed by over 30 years of experience and a 10-year product guarantee from Brett. Whether you’re tackling a single block or need expert assessment of wider damage, their Brett Approved Premier Installer status ensures work meets rigorous British Standards. Get started with a free, no-obligation estimate and protect your investment properly.
Frequently Asked Questions
What causes block paving to become damaged and require replacement?
Block paving can become damaged for several reasons. Frost heave occurs when water beneath the sub-base freezes and expands, pushing pavers upward. Poor compaction of the bedding layer or sub-base can cause uneven settling. Heavy vehicle loads, tree roots, and edge restraint failure can also crack or displace individual blocks. Root cause analysis is essential: check whether damage is localised to one or two pavers or indicates a broader sub-base problem before deciding whether to patch or re-lay the entire section.
What tools do I need to replace damaged block paving bricks myself?
Essential tools for block paving repair include a cold chisel, rubber mallet, plate compactor, and a level. You'll also need a shovel, broom, and protective equipment such as gloves and safety glasses. For removing stubborn blocks, a block removal tool or pry bar is invaluable. You'll need kiln-dried sand for the bedding layer and jointing sand for finishing. Consider whether to hire a plate compactor rather than purchase one, as rental costs are often more economical for single projects.
Can I replace just one damaged block paving brick, or do I need to re-lay the whole section?
In most cases, you can replace individual damaged blocks without re-laying the entire area. However, if the damage is caused by sub-base failure, frost heave, or poor compaction, replacing only the surface pavers will not solve the underlying problem and damage will recur. Inspect the bedding layer and sub-base carefully. If they are sound and level, a patch repair is sufficient. If you find settlement, displacement, or soft spots beneath, you'll need to address the sub-base before laying new pavers.
How do I match the colour of replacement block paving bricks to my existing driveway?
Colour matching is challenging because pavers weather and fade over time. New blocks will initially appear brighter than older ones. If your driveway is several years old, ask your supplier whether the original brick colour is still in production. Some weathering occurs naturally within weeks of installation. If an exact match is impossible, consider replacing a larger section to create a uniform appearance, or accept that new blocks will gradually blend as they weather. Discuss colour options with your supplier before purchasing replacement pavers.


