

Table of Contents
- Understanding Resin Driveway Sub-Base Requirements
- Key Installation Practices That Prevent Cracking
- Resin Bound Driveway Maintenance Tips to Avoid Failure
- Common Causes of Resin Driveway Failure and How to Avoid Them
Last Updated: August 12, 2026
Understanding Resin Driveway Sub-Base Requirements
A properly prepared sub-base is the single most important factor in preventing resin driveway cracking, yet it remains the most commonly overlooked step in installation. Without adequate sub-base preparation, even the highest-quality resin will eventually fail.
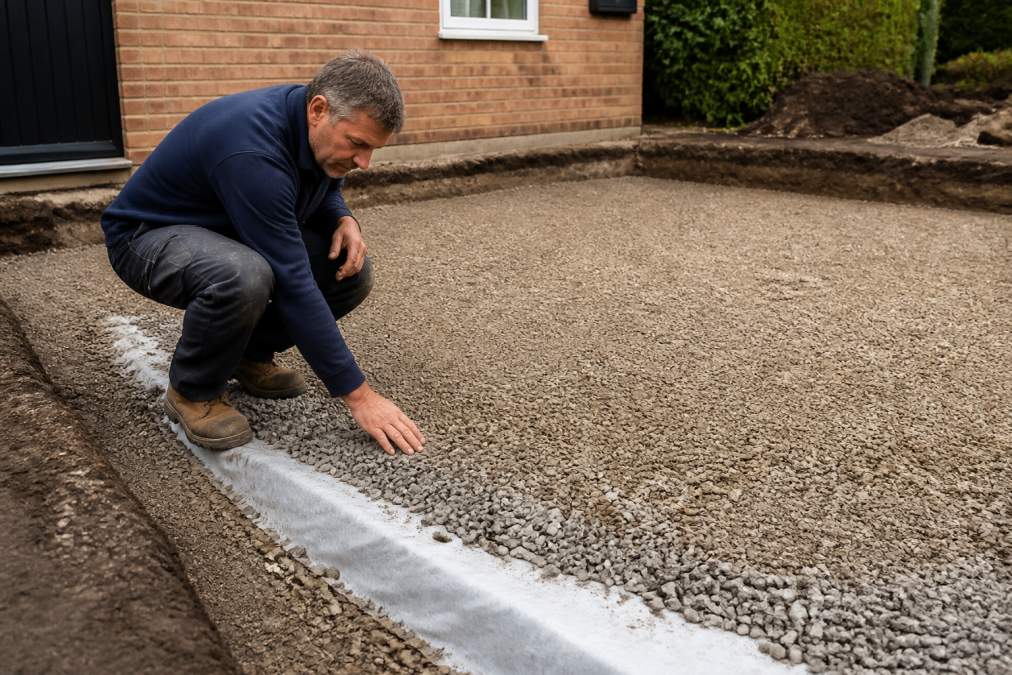
The sub-base must be compacted to the correct density and depth to support vehicle weight and resist ground movement. Most cracking issues trace back to insufficient compaction or inadequate excavation depth. A sub-base that shifts or settles after installation transfers stress directly to the resin-bound layer above, creating reflective cracking patterns months or years later.
Excavation depth matters significantly. The ground should be excavated to a minimum depth of 150mm, with the sub-base consisting of two layers: a coarse aggregate base layer (100mm) followed by a finer compacted layer (50mm). Each layer must be compacted separately using appropriate machinery to achieve 95% Proctor density, ensuring sufficient load-bearing capacity to prevent settlement.
Soil composition and ground movement analysis cannot be ignored. Clay soils, common in Norfolk, are particularly prone to movement during wet and dry cycles. A professional assessment of existing soil conditions should inform sub-base design. Geotextile membranes are often recommended to separate the sub-base from the soil beneath, reducing the risk of soil particles migrating upward and destabilising the structure.
Many installers rush the sub-base preparation because it’s invisible once the resin is applied. The real problem emerges 12-18 months later when ground movement causes stress points in the resin layer. Proper sub-base work is the difference between a driveway lasting 10 years and one failing after two.
Key Installation Practices That Prevent Cracking
Installation conditions and timing have a profound effect on resin driveway performance. Resin-bound surfaces should only be installed when ambient temperatures are between 10°C and 25°C, with the surface temperature ideally between 15°C and 20°C. Cold temperatures slow curing and trap moisture; hot temperatures accelerate curing unevenly, causing differential stress. Spring and autumn tend to be the best seasons for installation work in the UK climate.
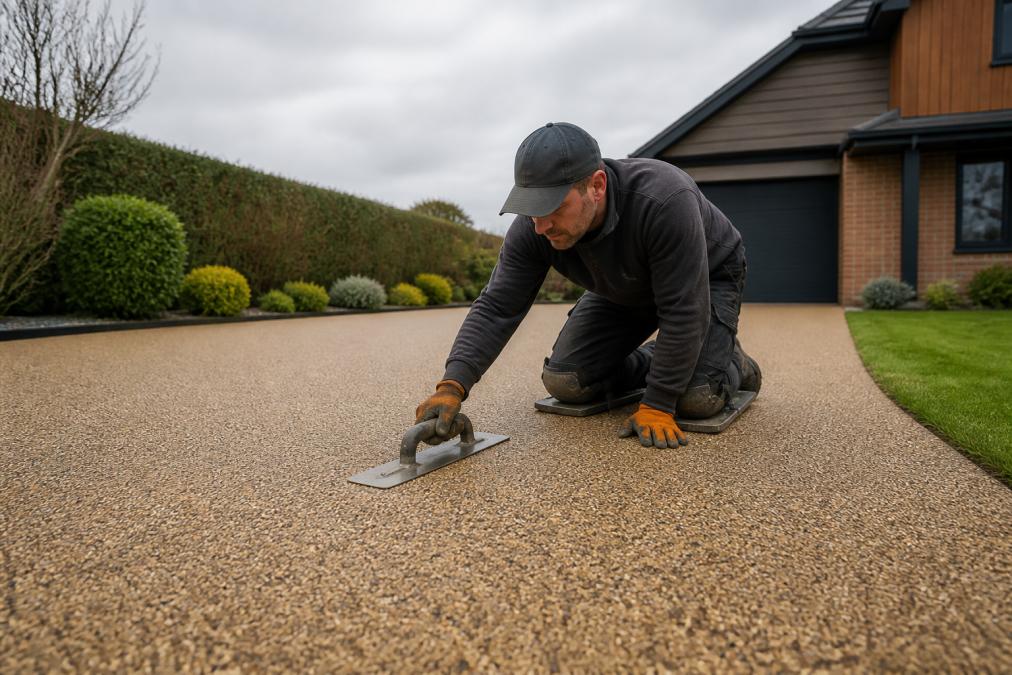
The resin-to-stone ratio is critical and often overlooked. The correct ratio ensures the aggregate is fully bound without excess resin pooling on the surface. Too little resin leaves voids where moisture can penetrate; too much creates a slick surface that sheds aggregate over time. Professional installers follow manufacturer specifications precisely.
Surface preparation before resin application sets the stage for adhesion and longevity. The existing surface must be clean, dry, and properly profiled. Pressure washing followed by thorough drying is standard practice, though drying time depends on humidity and temperature.
Expansion joints are a practical necessity that many DIY approaches skip. These small gaps (typically 10-15mm) are placed at regular intervals (every 4-6 metres) to allow the resin-bound surface to expand and contract with temperature changes. Without them, stress builds up and manifests as cracks. Professional installation standards in the UK require expansion joints as standard.
Resin Bound Driveway Maintenance Tips to Avoid Failure
Once installed, ongoing maintenance determines whether a resin-bound driveway remains intact or begins to fail. A structured maintenance schedule prevents small issues from becoming major structural problems.
Debris removal should be done regularly, ideally weekly during autumn when leaves accumulate. Organic matter traps moisture against the surface and accelerates degradation. Pressure washing is effective, but should be done carefully at low pressure (under 100 bar) to avoid damaging the resin layer.
UV-resistant sealers extend the lifespan of the resin surface significantly. A quality sealant applied every 2-3 years protects surface integrity and maintains colour vibrancy. The sealant also provides an additional moisture barrier.
Surface wear and tear patterns tell a story. Chipping or spalling at the edges often indicates water ingress or inadequate edge protection. Small cracks should be sealed immediately with a flexible resin repair compound to prevent water penetration and stop them developing into larger structural failures.
A maintenance schedule tailored to seasonal changes works best. Spring checks should focus on winter damage, cracks, loose aggregate, and drainage issues. Summer maintenance emphasises cleaning and sealant application. Autumn requires debris management and drainage verification. Winter preparation means ensuring water can drain freely and checking for ice damage.
Ignoring small cracks is a false economy. Water enters through hairline cracks, freezes in winter, and expands, widening the crack further. A crack that costs £50 to repair today becomes a £5,000 problem if left untreated for two years.
Common Causes of Resin Driveway Failure and How to Avoid Them
Understanding what causes resin driveway failure helps homeowners and installers prevent it. The most common failure modes stem from sub-base issues, installation errors, or poor maintenance, each preventable with proper knowledge and execution.
Reflective cracking occurs when cracks in the substrate below transfer stress upward through the resin layer. This happens when the sub-base settles unevenly or when ground movement creates stress points. The prevention strategy is straightforward: ensure the sub-base is properly compacted, monitor for settlement in the first 12 months, and address any signs of movement immediately.
Porosity and moisture ingress represent a silent threat. If the resin-bound surface develops porosity, water penetrates these spaces and destabilises the structure. Proper installation technique, correct resin-to-stone ratios, and attention to ambient conditions during curing all prevent porosity from forming.
Structural failure due to inadequate load-bearing capacity is usually a sub-base problem. If the sub-base cannot support vehicle weight, it settles and the resin layer fractures. Excavation depth and compaction standards exist to prevent this. Skipping these steps guarantees failure within a few years.
Small repairs, filling hairline cracks or resealing edges, can be handled by homeowners with the right materials. Large-scale repairs or structural issues require professional assessment and intervention.
KT Lake Paving and Landscaping has spent over 30 years installing resin-bound driveways across Norfolk. As a Brett Approved Premier Installer, the company ensures every resin driveway installation meets rigorous British Standards, with each project backed by a 10-year product guarantee.
Prevent resin driveway cracking by focusing on three essentials: a properly compacted sub-base, installation during optimal weather conditions, and consistent maintenance. These three factors account for over 90% of success in preventing failure.
Preventing resin driveway cracking is fundamentally about getting the invisible work right before the visible work begins. The sub-base, installation conditions, and ongoing maintenance are where durability is built or lost. Homeowners in Norfolk seeking reliable, professional installation and guidance on maintaining their resin-bound driveway can access free, no-obligation consultations and detailed estimates through KT Lake Paving and Landscaping, ensuring their driveway investment is protected for years to come.
Frequently Asked Questions
Why is my resin driveway cracking?
Resin driveway cracking typically results from poor sub-base preparation, inadequate compaction, or ground movement beneath the surface. Improper curing conditions during installation, such as incorrect ambient temperature or moisture content in the base, also cause stress points to develop. Additionally, using incorrect resin-to-stone ratios or low-quality materials can compromise the surface integrity. Ground movement and soil composition issues are common culprits in areas with unstable foundations.
How important is the sub-base in preventing resin driveway failure?
The sub-base is absolutely critical. A properly prepared, compacted sub-base distributes load-bearing forces evenly and prevents reflective cracking from ground movement below. Inadequate excavation depth, poor compaction, or failure to use geotextile membranes creates stress points where cracks initiate. Professional installation standards require specific compaction levels and drainage efficiency to ensure long-term surface stability.
What maintenance schedule should I follow to prevent resin driveway cracking?
Establish a seasonal maintenance checklist: remove debris regularly to prevent porosity issues, inspect for hairline cracks quarterly, and apply UV-resistant sealer every 2-3 years to maintain surface vibrancy and protect against wear and tear. Address minor chipping or damage immediately before they develop into larger structural failures. Avoid heavy loads during the first 7-10 days after installation while the curing process completes.
When should I hire a professional for resin driveway repair instead of attempting DIY fixes?
Hire a professional if you notice deep cracks, widespread surface failure, or signs of sub-base instability. DIY repairs work for minor hairline cracks or surface wear, but structural issues require professional assessment. Poor DIY repairs can worsen the problem and lead to costly replacement. Professional installers understand soil composition, expansion joints, and proper material ratios, knowledge essential for lasting repairs.


